Creating Thumbnails
Introduction
A thumbnail is a small image of an original image.
You would use thumbnails when you want to display several images on a web page. Rather than placing the large images under each other and the visitor to your site having to scroll to see each one, you could place several small images side by side. If these were thumbnails, and were linked to the large image, the visitor could click on the thumbnail of the particular image they wish to view and the original image would appear.
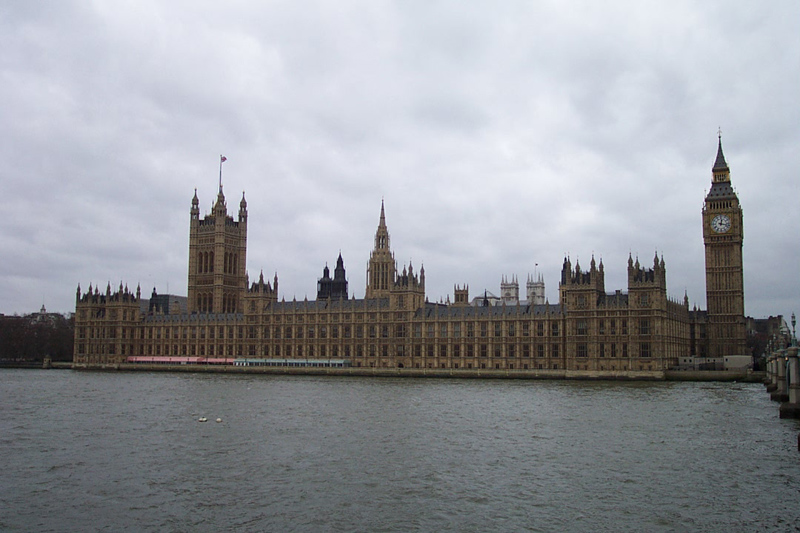
Below are some examples - click on the image and a large image of the Houses of Parliament will appear. (Click on the Back button in your browser to return to this page). I have made the width of the first image equal to 200 pixels. If you feel this is too large, you can change it to 150 pixels or 100 pixels as shown in the other thumbnails. This is your choice and will depend on how you wish your webpage to appear.
 |
|
|
||
width
= 200 pixels |
width
= 150 pixels |
width = 100 pixels |
To Create a Thumbnail
Open the image into Adobe Photoshop Elements.
If you do not have an image, click on one of the images above to display the full sized image of the Houses of Parliament, Right Mouse Click and select Save Picture As from the pop up menu.
The Save As dialogue box will appear, select your folder, and save the image. Go to Photoshop Elements, select File >Open and then locate the image and open it.
Select Image > Resize > Image Size and the following dialogue box will appear.
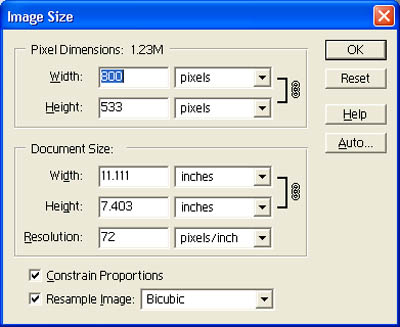
Ensure the Constrain Proportions check box is checked and change the value of the Width (currently 800 pixels) to the size of your required thumbnail image, e.g. 200 pixels, 150 pixels or 100 pixels). The height is adjusted proportionally. Click OK and the image is re-sized.
Save the file.