Enhancing Images with Autolevels and Levels
When you take an image with your digital camera, it is possible to change the appearance of the image in many ways.
One of these is by adjusting the levels through the Enhance menu option and using the Autolevels and the Levels features.
Download the two images displayed below. Click on the thumbnail images to display the larger images and download the images to your hard drive.
To download the larger image, place your mouse pointer on the larger image, RMC (Right Mosue Click), and select Save Image As
 |
 |
|
|
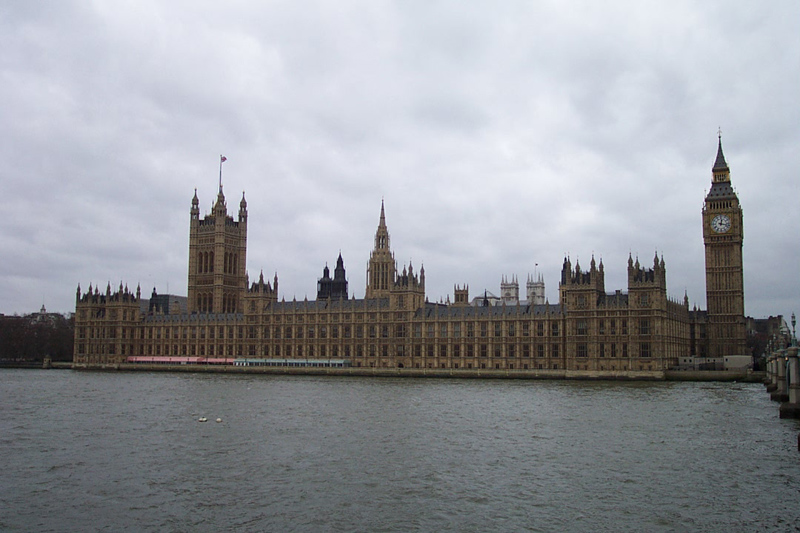
Click this
thumbmail to view the larger Houses of parliament image |
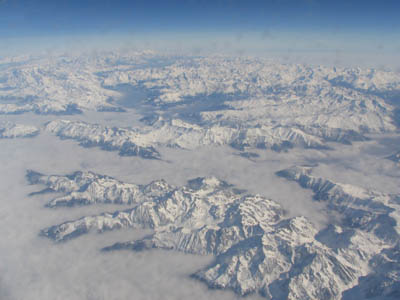
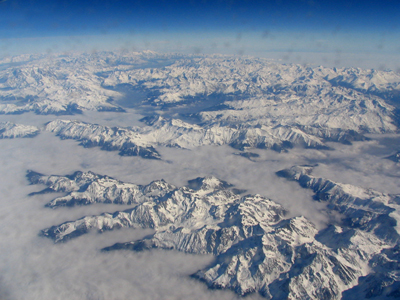
Click
this thumbnail to view the larger French Alps image |
Using the
Autolevels feature
The Auto Levels command defines the lightest and darkest
pixels in an image, and then redistributes intermediate pixel values proportionately.
Because Auto Levels adjusts each color channel (red, green, and blue)
individually, it may remove or introduce color casts.
Auto Levels gives
good results when an image with an average distribution of pixel values
needs a simple contrast adjustment.
(Adobe Photoshop Help Index)
Start Adobe Photoshop Elelments - open the large Houses of Parliament image.
Select Enhance > Autolevels
You should notice a slight change in the tone of the image.
Click on the Undo button on the toolbar and then the Redo button to compare the effect of the Enhance > Autolevels feature. You may feel you don't want to allow Photoshop Elements to control the colours on your image, and so you can do it manually.
Using
the Levels feature
The Levels dialog box lets you correct the tonal range and
color balance of an image by adjusting intensity levels of the image's
shadows, midtones, and highlights. The Levels histogram serves as a visual
guide for adjusting the image's key tones.
(Adobe Photoshop Help Index)
Open the larger image of the French Alps
Select Enhance > Autolevels
I find the contrast is too strong and do not like the result. Click Undo to restore the image to the previous colour values.
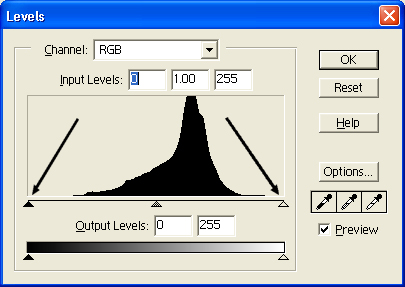
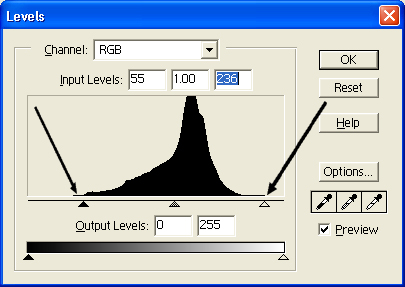
Select Enhance > Brightness/Contrast > Levels and a dialogue box similar to the one on the left below appears.
 |
 |
|
Start
Image |
End
Image |
|
Notice
the triangles are on the outside of the histogram |
Notice
the left and right triangles have been moved to extremeties of the
histogram |
The histogram shows the black and white levels. You will notice there is a gap on each end of the range.
Use your mouse to move the small triangle on the left of the base line to the right so it is under the left side of the histogram.
Move the triangle on the right side of the baseline to the left so it is under the right side of the histogram.
See the Start and End images above to see how the histograms will appear.
You should see a change in the image similar to the images below. Notice the sharper contrast and more detail.
 |
 |
|